by Danny Nichols
In the late summer of 2017 my wife and I decided to move forward with our long-desired goal of owning a greenhouse. After extensive review of the products available and reading customer reviews, we selected a 6 X 8 ft Palram greenhouse from Home Depot. The unit was not carried in store but was ordered and shipped to the store within an acceptable period of time. The exact name of the unit was the Harmony 6 x 8 ft by Palram.
Meanwhile, I worked to level the area upon which the greenhouse was to be situated. Our back yard slopes in several directions so finding the most level spot and one yet convenient for the intended purposes took a bit of review. Once decided I used 2 x 4 lumber pieces to check the levelness (is this a real word?) of the spot we selected. Finding it to still have a 2” drop over a span of 6 feet, I began hauling in dirt to build up the lower side. The dirt was tamped to help secure it to the ground and rocks and bricks were used around the site to help keep the dirt in place.
Home Depot acknowledged receipt of our new greenhouse and I went to pick it up having no idea as to how it would be packed. I felt that with pieces that might be as long as 8 ft that I would need to haul it in a truck. Upon arrival at Home Depot the greenhouse was retrieved from its storage area and wheeled up to the check-out counter. It was only then I saw the creative packing of the unit. Contained in two boxes all the metal parts were in one long box that was quite heavy while the polycarbonate panels were packed in a smaller box. Considering the price and size of the greenhouse, I wondered how in the world did they get all that into two boxes!
Upon arrival at home I opened the boxes to review their contents and find the instruction manual. I know. Men aren’t supposed to use instruction manuals. Please be advised, however, that without the manual (and even with it) assembly is no small matter. The step by step assembly instructions are presented only in pictorial displays. There were no written instructions despite the use of 18 pages being devoted by Palram to present the 18 different languages offered for the usual precautionary data relative to safety, care & maintenance, tools and equipment needed, nine specific steps to be aware of during installation and a note about anchoring product to the ground being required for the warranty to be valid. Anchored to the ground?!! Yes, the anchor kit must be ordered separately. It does not come in the kit.
I first checked to see if all the parts were in the boxes. We have seen more than one review that said the company had left out a few parts here and there for other customers who purchased this item. After the 3’rd attempt, I was finally able to match up all the parts on the included parts list from the instruction page. This took quite a while to do. There are a lot of parts! And many of the parts looked the same but later I understood there were lefts and rights for nearly every piece. And it took patience to understand that a part labelled 969 could easily be 696 when turned upside down. Why the manufacturer chose 3 digit numbers to identify the parts with was not so helpful to the person doing assembly.
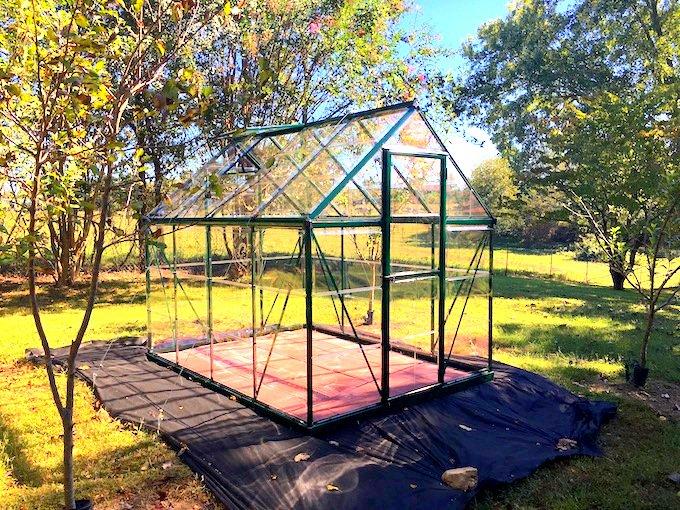
I began laying out the pieces and putting them together in the manner prescribed in the step by step pictures provided. A few extra tools made the job move a bit more quickly but the manufacturer did a good job in providing about everything needed for assembly. The bottom wall framing was the first part to be constructed. Once laid in place, the walls began to go up. The pieces making up the wall framing all bolted together with the provided bolts, nuts and washers that came in the pack. Keeping aligned properly while placing the bolts became tricky. Once the wall was erected the roof framing came next. Continuing also to be a tricky step, it is here where one must pay really close attention. More than once I had to go back, undo, and redo the joints. When the roof framing was complete, the polycarbonate panels are designed to slide into place. Not fun but doable after some “practice” attempts. The roof also included one venting pane which can be raised when fresh air is desired inside or for venting when the inside temp gets too hot.
To secure the greenhouse to the ground during strong winds we selected a special kit also offered by Palram that held it in place with two cables stretched across the roof of the structure and attached to two spiral stakes screwed into the ground. This application was not thought through too well by the supplier as the placement of the cables did not match up well with the placement of the roof panels. Especially when one of those panels becomes the vent. It was as if vent placement were not part of the consideration when designing the anchor kit and certainly not considered when creating the visual instruction for assembly. The placement of the anchor cables as depicted in the manual can and will interfere with the functioning of the vent pane. For it to work properly, the cable must be positioned over a panel as it will restrict opening the vent pane when aligned with the panel framing as shown. All in all the secure system worked (so far) but not as neatly as I would have desired.
After the greenhouse was assembled I began to lay the concrete pavers to form the floor of the greenhouse. These had been purchased in advance. Given the dimension of the inside of the base frame, several of the pavers had to be cut off to fit as desired. This was accomplished with a special concrete cutting blade on the skillsaw. (Neither provided as floor designs are up to the owner.) It was then I realized just how well a greenhouse worked! The temp inside had zoomed already to 120 degrees in the sunlight and placing all 48 pavers became a heat intensive project. I now realize I should have laid the pavers immediately after constructing and situating the wall base of the greenhouse. Mental note made to do this the next time I construct a greenhouse.
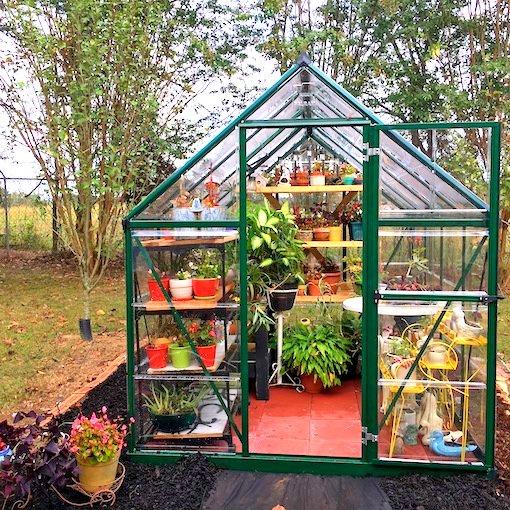
With the construction completed it then became time to add the visual effects surrounding the greenhouse. Weed blocker cloth was lain upon the ground around the four sides of the building. Additional bricks and limestone rocks were hauled in and arranged to form a short wall on top of the weed cloth and around the perimeter of the greenhouse. The retaining wall extended about 2 feet from the building. Barky Beaver mulch was then spread within the area surrounding the greenhouse with one open space in front for a walkway into the building. Now it was time to sit back and enjoy the results of two days of labor.
As winter approached we started the process of moving flowers from Claudia’s backyard flower garden into the greenhouse for winter protection. For supporting the many flower pots that would grow to fill the greenhouse, we used odd and end shelving units that allowed us to utilize the vertical height of the building. This worked out well to accommodate the many beautiful flowers that Claudia had grown during the course of the spring and summer.
Selected flowers would later be moved to the house to protect them during the coldest months of the winter as we had not yet provided for any heating source for the greenhouse. Some of the plants that remained there will not survive the coldest parts of our Tennessee winters. For a period of time we placed an electric heater inside the greenhouse which protected it during those early cold nights before we moved plants into the house. A 100-foot extension cord plugged into an outside outlet was used to power the small heater.
Another mental note is made regarding whether it would be prudent to run electrical wiring to the building for both heat and lighting needs. Going forward we will need to think through for a better solution to heating and/or lighting our greenhouse during the winter months. For now, we are excited about having our new greenhouse available to us for starting new plants and growing them through the spring and summer of 2018.
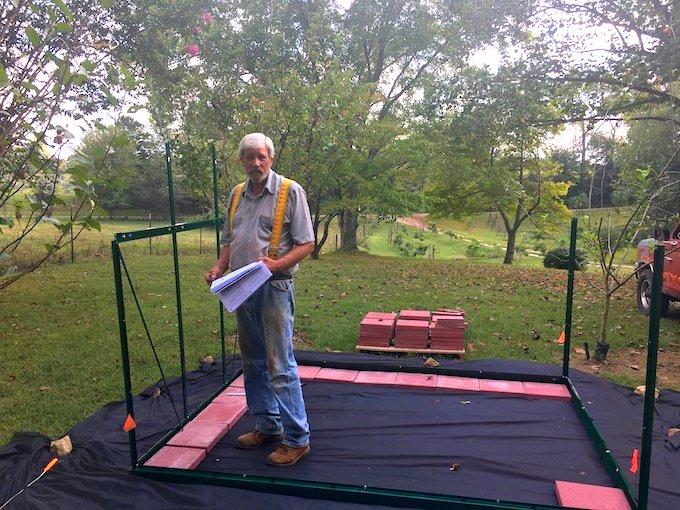
Initial stages of construction of the Palram greenhouse.

The greenhouse took time to construct but is very sturdy.
Ready for plants!
We had a particularly warm autumn the first year, which enabled us to leave our plants in the greenhouse until November.